Marching Cubes
William Lord
Project Overview
When I was finishing my degree at ASU in 2022, I had the opportunity to complete an undergraduate thesis project with supervision from two ASU faculty members. I implemented the Marching Cubes algorithm to generate complex terrain, similar to creating a 3D graph. The end result is implemented in the Unity game engine (with scripts written in C# and HLSL).
I also measured performance to illustrate why we use graphics cards in modern computers and completed a project writeup and presentation for my thesis committee, which can be found in the project Read-Me on GitHub!
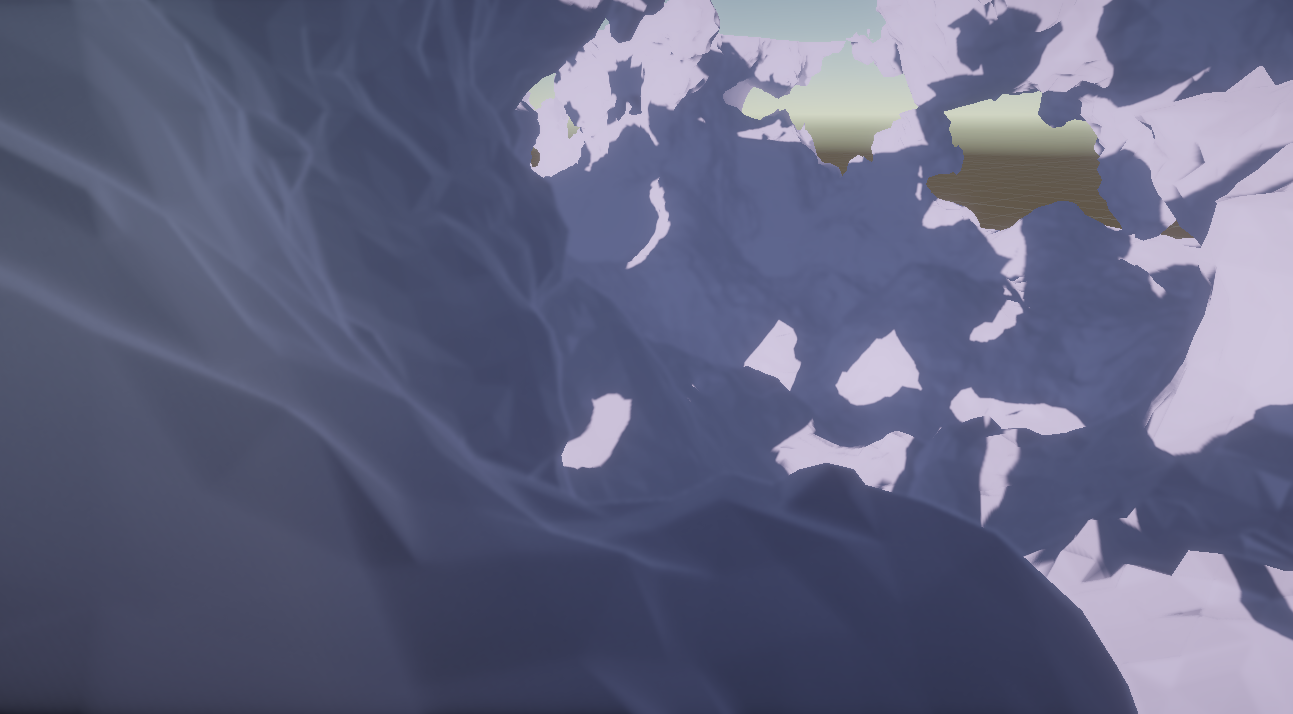
Moving terrain generated with the Marching Cubes algorithm.
Understanding The Algorithm
Why it Works
The most difficult part of implementing marching cubes is understanding the algorithm itself, in part because you have to understand why it works the way that it does. While a CPU generally runs code concurrently, meaning it multitasks by switching back and forth between things very quickly, this approach isn’t well suited for certain types of problems. A lot of graphics programming problems can actually be broken down into fully independent tasks, and at that point you’re really losing out on a lot of efficiency as a CPU by doing them one at a time.
A more clever approach would be to divide the workload between a huge batch of processors that can do them all at once. This is what a graphics card is; while a CPU has a few very powerful processors, GPUs have a huge number of very dumb processors, which allow them to solve graphics programming problems very quickly.
One of the key ideas behind the marching cubes algorithm is the density function, a 3D mathematical function that describes the terrain we want to render. The advantage of doing it this way is that we can simply plug in any xyz coordinate value and get an output without having to rely on the results of a previous calculation. This means that generating a chunk of terrain becomes a fully independent task, and we can generate lots of chunks at the same time, making the process really efficient.
How it Works
Now let’s talk about the algorithm a little more specifically. Each chunk is composed of 32x32x32 smaller cubes called voxels, and within these voxels we are going to figure out two things. First, does the terrain intersect this voxel? Second, if it does intersect this voxel, how do we construct the mesh to show it? This is where the density function comes in. We evaluate the density function at each of the eight corners of the voxel. From there, we combine these values in a very specific way to get a voxel case; a number between 0 and 255 which tells us which edges of the voxel will have a vertex on it, and the order in which to connect them to create the part of the mesh intersecting this voxel.
From there, we do a little more work to figure out where exactly along that edge the vertex should be, and then we combine all that information in all of our chunk’s voxels to create the final mesh for that chunk. Essentially, we’re graphing our terrain function on a 32x32x32 graph and deducing how to connect those points together. We do that as many times as we want in parallel, then put all those meshes together to create a seamless terrain.
Process
I solved this problem in two milestones. The first was the project that I created for my graphics programming class, where I simply figured out how to implement the algorithm in code. The missing piece here was that it wasn’t efficient yet, because it wasn’t happening on the GPU so nothing was running in parallel. The second milestone was reimplementing the algorithm in Unity using a compute shader to actually perform it on the GPU.
Part 1 - Exploring the Algorithm
Lets start with the first milestone. In order to get started, I decided to forget about the part where you generate an accurate mesh, and instead simply generate something in each voxel intersected by the terrain. Voxel cases 0 and 255 represent a voxel that is completely above or below the terrain, so in any voxel that wasn’t one of those two cases, I generated a cube. The result of this was a very blocky representation of my terrain function.
 My first step towards implementing the Marching Cubes algorithm.
From there I worked to implement the rest of 256 vertex cases, where each Minecraft cube would be replaced by a polygon that actually described the surface. The important thing to know about the voxel cases is that they are generalizations that don’t perfectly describe the surface; there is still a noticeable resolution of sorts that gives it a “low-poly” look. This happens because the generalizations place the vertices on the exact midpoint of the voxel edges, when in reality they should be elsewhere along the edge to fit the shape of the terrain more accurately.
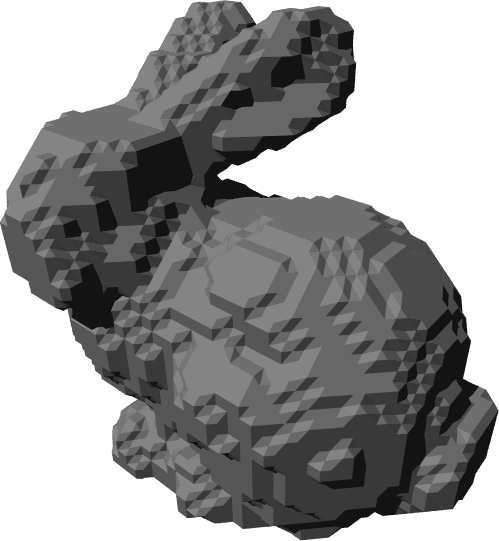 A bunny mesh rendered using Marching Cubes without vertex interpolation. source
This can be remedied by interpolating each vertex along the edge to exactly fit the surface we are modeling. Basically, we take the density values on the ends of each edge, and find the point in between them where the value should be 0. This represents the exact height of our terrain. Once each point is interpolated, the surface will be as accurate as we can manage at that voxel resolution. In other words, we would need a higher density of polygons to improve the smoothness. Once I did that, I finally had a working implementation of this algorithm.
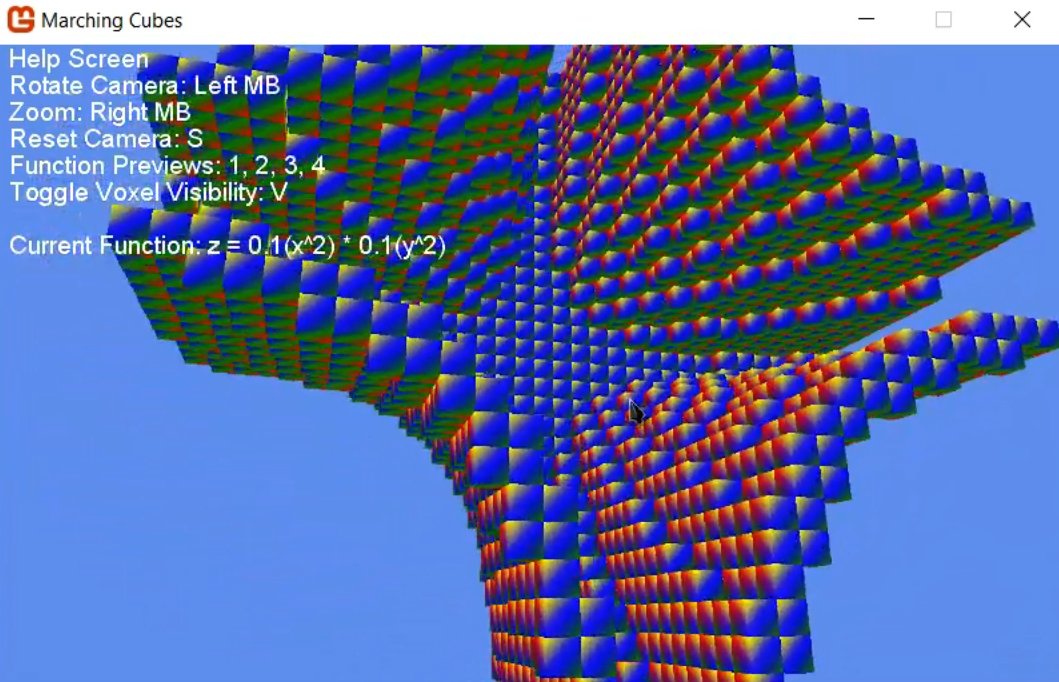
Showcasing the project at the first milestone.
I’m sure it was difficult just reading all that, so you can only imagine having to program it. The first version of the project was made in a barebones game engine called Monogame. The logical next step would be to render the terrain in a real game engine like Unity. I pitched this idea to the professor as the basis for an undergraduate thesis project, which he agreed to. Despite all the effort I had put in so far, the next hurdle would be the biggest yet. At this point, the algorithm was not quite done correctly, because it still ran on the CPU. To really get this algorithm working and performing correctly, I would have to write the code again as a shader on the graphics card.
Part 2 - Upgrading to Unity
This section is quite short, mostly because so much of my time was spent reading blogs and watching videos on shaders in Unity, and trying to scrounge for graphics programming resources to help me solve and debug my problems. All that I really did was dispatch a handful of compute shaders, solve the same problem I had already solved, then get that data back from the GPU. Despite that, it took months to finish because of how much I had to learn about graphics programming, and how limited the resources are for it compared to more common types of programming.
If you want to write GPU code for Unity, you use a language called HLSL, which is actually quite specialized. I had to learn a lot about how graphics programming problems are solved just to reimplement an algorithm I had already written. Communication between the CPU and GPU goes through very specific channels. The data must be prepared on the CPU, the GPU shader is dispatched, then you retrieve the data from the GPU once the shader is finished. That makes it really obnoxious to try to figure out which part of your code isn’t working, because there are no print statements in HLSL, it’s barely above assembly language. You really just have to stare at it until you figure it out.
The data structures are also very specialized in graphics programming. It took me a while to simply figure out how to represent a block of terrain. Eventually I settled on an array of “render textures”, which are basically images. Imagine a cube sliced into 32 sheets that are each of 32x32 resolution images. Each pixel in a texture image represents a voxel instead of a color, and each texture represents a slice of our terrain. That’s how I got the voxel data out of the GPU, I wrote it into images.
Once everything was finally implemented, I went back and measured the performance. The calculations that took the most time on the CPU were the ones that were done for every voxel in the block of terrain. This is because you were essentially doing the same thing 32,768 times, one at a time. There were two such problems that I managed to delegate to the GPU. The first was assigning our vertex case between 0 and 255 based on the terrain function. The second was constructing the polygons for each voxel based on those vertex cases, interpolation included. At the end of the day, running the algorithm on the GPU took just 0.087% as long as it took on the CPU.
Future Work
If I were to revisit this project, I know exactly what I would improve. When updating a mesh in Unity, you must prepare two arrays, one representing the vertices and one representing the order in which those vertices should be connected. The tricky thing is that I had to create these structures after running the shaders by iterating over the data, which is exactly the problem we were trying to avoid in the first place. This is actually the single slowest operation between both the CPU and GPU programs I wrote for this algorithm.
The solution to this problem is something called a vertex shader. It would allow me to directly use the triangles I calculated to build the vertices of a mesh instead of having to use Unity’s default API, allowing me to skip that iteration step.
Conclusion
This project was without a doubt the hardest project I have ever worked on. It required me to learn the specifics of the Marching Cubes algorithm, and then learn a huge amount about graphics programming. While it was fun and incredibly fulfilling to solve, I’m not ready to return to it quite yet. For context, before I started I was informed that another student had attempted the same thing a couple of years before, and had to change their thesis shortly before the deadline because it was too much of a challenge. I did a presentation and a writeup for my thesis director and committee members, and I also made some brief videos of the terrain generation in action. If you would like to see those, check out the Read-Me on the project GitHub!